 how-to
What Is the Process for Dental Veneers?
Table of Contents
- How the Dental Veneers Process Starts: The Consultation
- Step 1 and 2: Preparing Your Teeth and Taking Impressions
- Step 3: Fabricating Your Custom Veneers
- Step 4: Bonding and Placing Your Veneers
- How Long Does It Take to Get Veneers From Start to Finish?
- What Happens to Your Teeth Under Veneers and Afterward
- Alternatives to Dental Veneers and Booking Your Next Step
- Frequently Asked Questions
Last Updated: October 28, 2026
Dental veneers are thin shells bonded to the front of your teeth, and the process for getting them varies. This guide covers the process, from the first consultation through aftercare, in plain terms.
How the Dental Veneers Process Starts: The Consultation
The process starts with a consultation, where your dentist decides whether veneers fit your goals and your teeth. This first visit is also where you talk through what you want the smile to look like.
What Your Dentist Checks Before Treatment
Your dentist will look at more than your smile. They check the health of your gums, your bite, and any cavities or cracks that need care first.
- Gum health: Gum disease must be treated before veneers are placed.
- Bite alignment: Uneven bites can cause veneers to chip or wear unevenly.
- Tooth condition: Decay or cracks need repair before a veneer can bond well.
- Tooth grinding: Patients who grind their teeth may need a night guard to protect their veneers.
- X-rays: Dental X-rays show the roots and bone beneath the surface of each tooth.
Choosing the Right Veneer Material
Your dentist can help you weigh cost, durability, and appearance for your teeth. The right choice depends on your bite, your habits, and your budget.
Step 1 and 2: Preparing Your Teeth and Taking Impressions
Once you choose a plan, your dentist prepares your teeth and takes a precise record of their shape. These steps set the fit and feel of your final veneers, and modern practices increasingly handle the record-taking digitally rather than with putty trays.
Tooth Preparation: How Much Enamel Comes Off
Your dentist numbs the area first with local anesthesia, so the procedure should be comfortable. If the prep is very shallow, some patients need no numbing at all. After preparation, the dentist checks the bite and the clearance so the finished veneer will not sit proud of the neighboring teeth.
Traditional Impressions vs. Digital Intraoral Scanning
This is where the process has changed most in the last decade. The goal is the same, give the dental laboratory an exact record of your teeth, gums, and bite, but the tools differ.
Traditional putty impressions use a tray filled with a soft alginate or vinyl material that sets against your teeth. They work, but the material can trigger a gag reflex, the tray can feel bulky, and the model can distort if it is poured or shipped incorrectly.
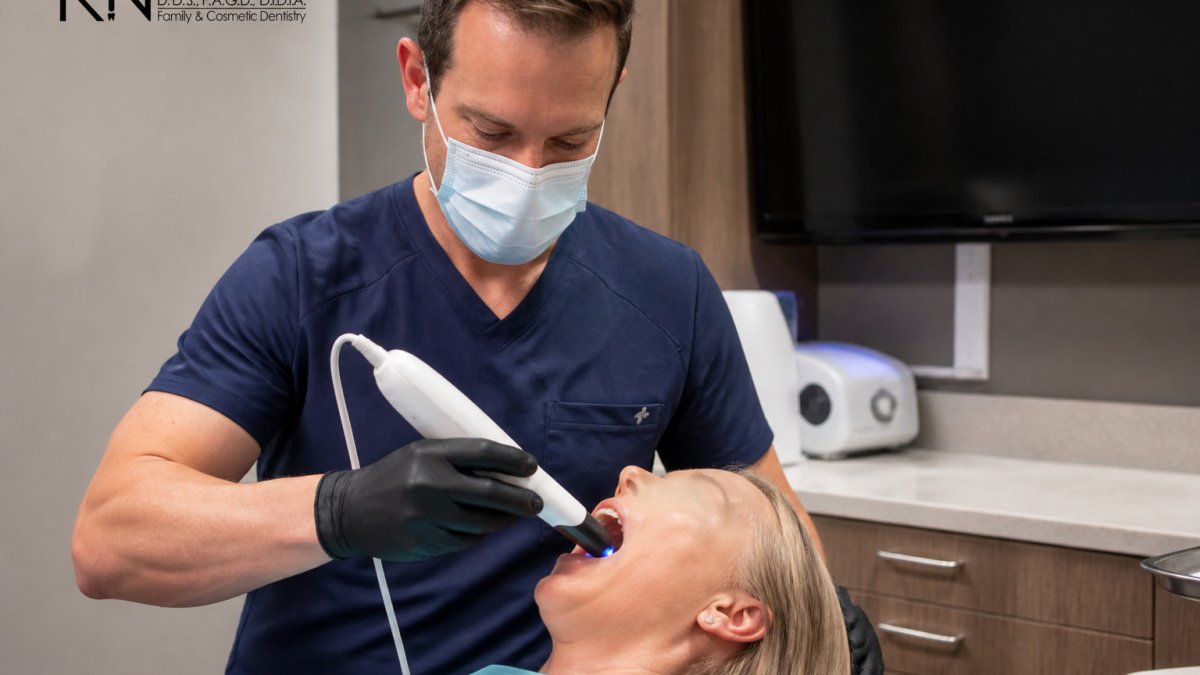
Digital intraoral scanning uses a handheld camera that builds a 3D model of your mouth in real time. The scanner captures the prepared teeth, the surrounding teeth, the gumline, and your bite in one sitting. Advantages patients notice:
- No tray and no impression material, so less gagging
- The dentist can see the scan on screen immediately and rescan any area that is unclear
- The file goes to the lab electronically, which shortens turnaround and reduces shipping errors
- The same scan can drive a digital smile design so you preview the shape before the lab milles or layers the veneers
Many practices now use an intraoral scanner as the default and reserve putty only for cases where the scanner cannot capture a clear margin. Ask which method your dentist uses, it affects both comfort and how quickly the lab can start.
Temporary Veneers
Here is what most patients experience during these two steps:
- Numbing with local anesthesia before any tooth work begins, if needed
- Gentle removal of a thin layer of enamel, often 0.3 to 0.5 millimeters for porcelain
- A digital scan or a putty mold of your teeth and bite
- A bite check to confirm clearance for the veneer
- Temporary veneers, if needed, until your final set arrives
- A short visit, often one to two hours
The two preparation steps differ in how the dentist records your teeth, so the table below compares the two impression methods the article describes.
| Method | Best for | Key difference |
|---|---|---|
| Traditional putty impression | Cases where scanner cannot capture a clear margin | Soft tray material can trigger gagging |
| Digital intraoral scanning | Most patients as the default | Handheld camera builds a 3D model in one sitting |
| Digital intraoral scanning | Faster lab turnaround | File sent electronically, reducing shipping errors |
| Putty impression | Patients who want no scanner | Model can distort if poured or shipped incorrectly |
Step 3: Fabricating Your Custom Veneers
After your impressions are sent to the laboratory, a dental technician builds your custom veneers by hand. This stage usually takes one to three weeks, depending on the lab and the material chosen.
The technician shapes each veneer to match your tooth size, contour, and bite. Shade selection happens at this point too. Your dentist will often share a shade guide so you can help choose a color that blends with your natural teeth.
This is also where smile design matters most. A good veneer should look like a natural tooth, not a bright, flat block. Patients often ask whether their veneers will look fake, and careful shade work and shaping are the main ways to prevent that.
Step 4: Bonding and Placing Your Veneers
On the day of placement, your dentist checks the fit, color, and bite of each veneer before bonding. Then they prepare the tooth surface and the veneer so they stick firmly together.
The usual bonding process goes like this:
- The tooth surface is cleaned and lightly etched to help the bond hold.
- A bonding agent is applied to the tooth.
- Dental cement is placed on the veneer.
- The veneer is pressed into place.
- A curing light hardens the cement within seconds.
- Excess cement is removed and the bite is checked again.
Most patients leave the same day with their new veneers. Your dentist may schedule a follow-up visit to confirm the fit and check your gums.
How Long Does It Take to Get Veneers From Start to Finish?
Cost is often the next question. Veneer prices vary widely with the material, the number of teeth, and the lab used, so check with your dentist for a quote. Many patients ask about financing to spread out payments. Dental insurance often does not cover cosmetic work, so ask your office how payment and financing options work before you book.
What Happens to Your Teeth Under Veneers and Afterward
Veneers protect the front of your tooth, but the tooth underneath still needs care. Gums and the remaining enamel must stay healthy for the veneer to last, and the first few weeks after bonding are when most patients have questions.
Managing Sensitivity After Placement
Actionable steps that help in the meantime:
- Use a desensitizing toothpaste (look for potassium nitrate or stannous fluoride on the label) for two to four weeks
- Switch to a soft-bristled brush and brush with light pressure rather than scrubbing
- Avoid very hot or very cold drinks for the first week or two, and sip rather than hold cold liquids against the front teeth
- Ask your dentist about a fluoride varnish or a desensitizing gel applied in-office if sensitivity is sharp
- Do not chew on the freshly bonded veneers until any anesthetic has fully worn off, since you could bite your cheek or tongue without feeling it
Daily Care That Protects the Bond
Good daily habits help your veneers last:
- Brush twice a day with a soft-bristled brush and non-abrasive toothpaste; avoid whitening pastes with harsh abrasives that can dull the porcelain glaze
- Floss daily, especially along the gumline where veneers meet the tooth, using a gentle sawing motion rather than snapping the floss down
- Visit your dentist for regular cleanings and checkups, and tell the hygienist you have veneers so they can adjust polishing
- Avoid using your teeth to open packages or bite hard objects like ice, pens, or fingernails
- Wear a night guard if you grind your teeth, grinding is one of the most common causes of chipped veneers
Signs a Veneer Needs Replacement
Veneers do not last forever. Most last many years with good care, but they can chip, crack, or lose their seal over time. Watch for these signs and schedule a visit if you notice them:
- A chip, crack, or rough edge you can feel with your tongue
- A veneer that feels loose or moves when you press it
- Dark lines or shadowing at the gumline, which can signal the seal is failing
- Gum irritation or bleeding around a single veneer
- A change in your bite, or pain when biting on one tooth
- Visible wear that exposes the tooth edge beneath the veneer
A damaged veneer can let bacteria reach the tooth underneath, so a loose or chipped veneer is worth checking promptly rather than waiting for a cleaning. Signs Your Veneers Need to Be Replaced lists the warning signs to watch for.
How Old Veneers Are Removed and Replaced
American Dental Association, veneers overview
Alternatives to Dental Veneers and Booking Your Next Step
If you are thinking about veneers, consult a qualified dentist to discuss your options. Call 281-550-9054.
Frequently Asked Questions
What do dentists recommend instead of veneers?
A qualified dentist can discuss options based on your individual needs.
What is the difference between a crown and a veneer?
A veneer is a thin shell bonded to the front surface of a tooth, mainly to change its color, shape or alignment, and it typically requires removing only a small amount of enamel. A crown covers the entire visible portion of the tooth and is used when a tooth is significantly damaged, weakened or has had a root canal. Because crowns usually require more tooth reduction, the dentist will recommend one or the other based on how much healthy tooth structure remains and how the tooth functions when you bite and chew.
Does getting veneers hurt?
A qualified dentist can discuss what to expect and address concerns before treatment.